How to Read Violin Music for Beginners

What This Page Covers

These reading exercises are companion resources for my free beginner violin course. They are designed to be used alongside the matching lessons and videos rather than as random, stand-alone worksheets.

Learn to Read Violin Music Step by Step

Reading violin music becomes much easier when you learn it gradually.

We begin with the four open strings, then introduce the fingers one stage at a time. This helps you connect the notes you see on the stave with the string and finger you actually play on the violin.

The exercises on this page follow the same order as Lessons 5–8 of the free course, so each new stage builds directly on what you have already learned.
✓ Connect written notes with the four violin strings.
✓ Learn open strings before gradually adding the fingers.
✓ Practise note reading using exercises matched to each lesson.
✓ Build from open strings through to using all four fingers.
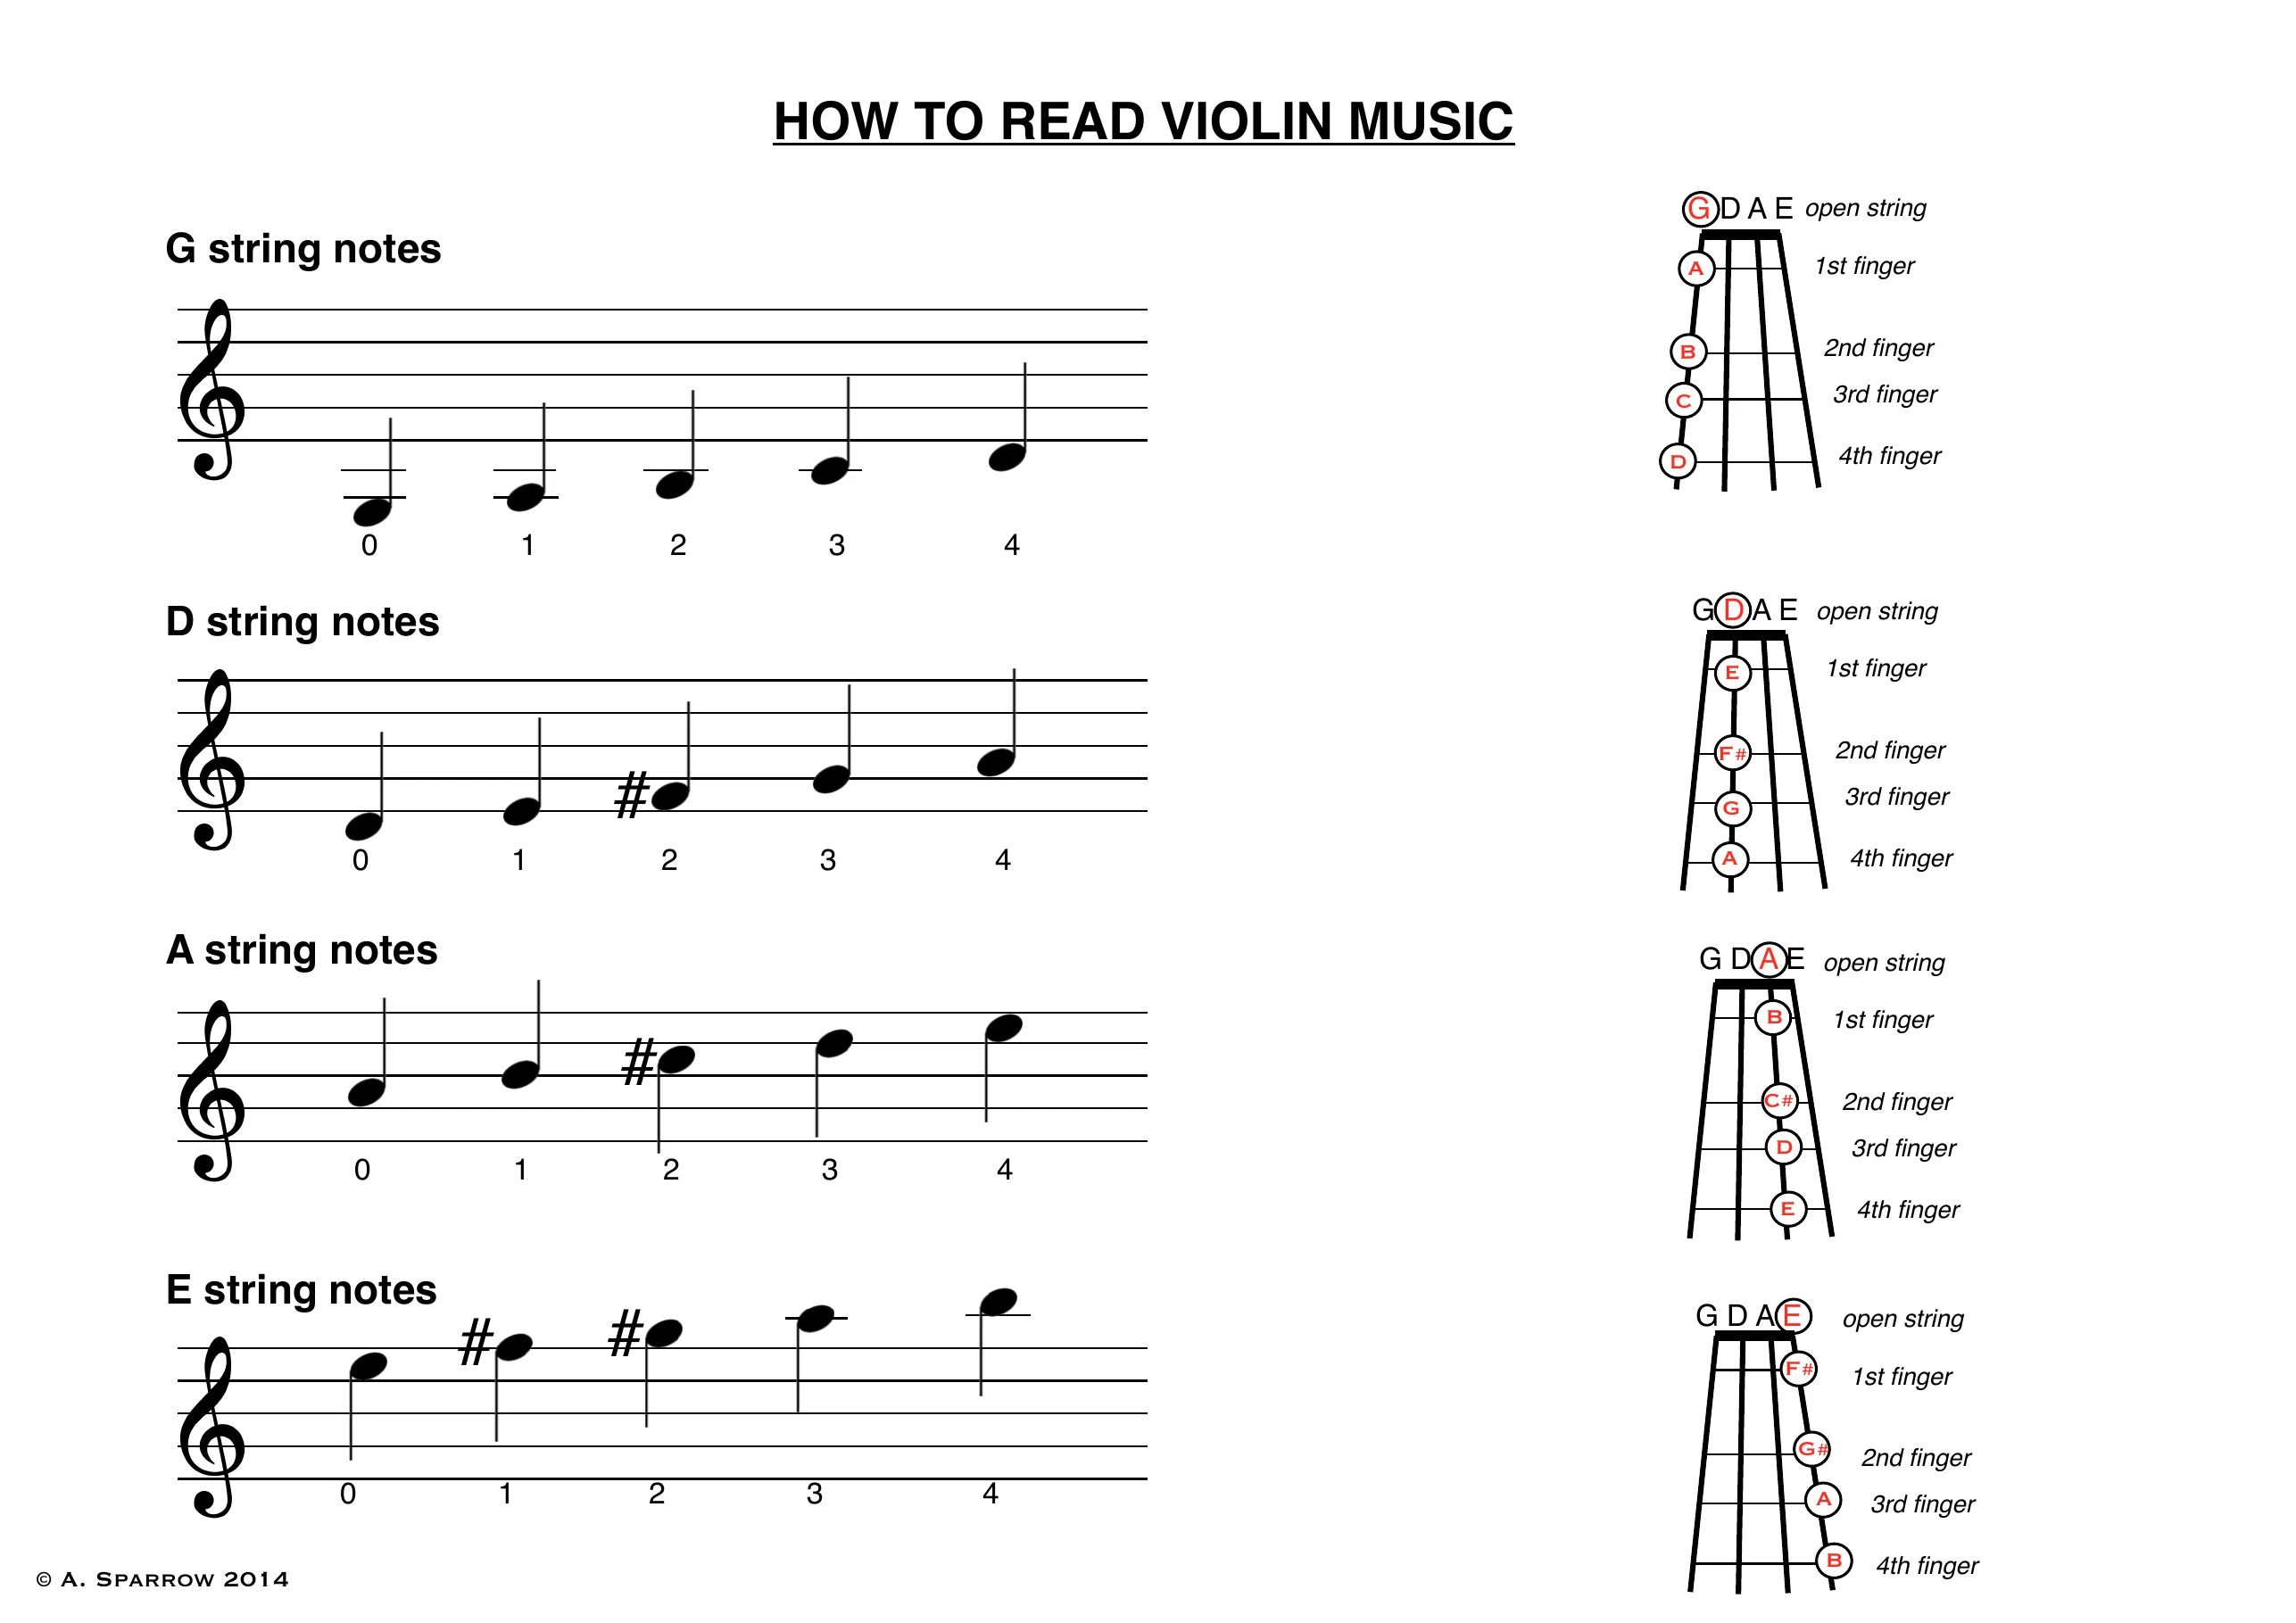
How to read violin music for beginners showing notes on the G, D, A and E strings with finger numbers 0 to 4

How to Read Violin Notes

This guide shows you how written notes on the stave relate to the violin fingerboard. As a beginner, the important thing is not to memorise everything at once, but to start seeing the connection between the note on the page, the string you play on, and the finger you use.

On the violin, each string has its own set of notes. The same finger number does not always mean the same note, because it depends which string you are playing on.

  • 0 = open string, which means no finger is pressed down.
  • 1st finger = your first finger goes down on the string to raise the pitch.
  • 2nd finger = the next note up, once the second finger is added.
  • 3rd finger = the next step higher again.
  • 4th finger = your little finger, used for the highest note in this beginner pattern.
In my free violin course, you learn these notes gradually through the matching lessons and exercises, beginning with open strings and then adding the fingers step by step.

Your Step-by-Step Learning Path

These resources follow the same order as the free violin course. Start with the open strings, then add the fingers gradually so each new stage builds on what you already know.

Lesson 5

Open String Exercises

Begin by reading and playing notes using only the four open violin strings: G, D, A and E. This lets you concentrate on reading the notes and changing strings before adding fingers.

WATCH LESSON 5 →
Lesson 6

Reading Music + 1st Finger

Use the How To Read Violin Music guide alongside the 1st Finger Exercises. This is where you begin connecting written notes with both the correct string and your first finger.

WATCH LESSON 6 →
Lesson 7

2nd Finger Exercises

Add the second finger to the notes you already know. The exercises build your reading step by step while increasing the range of notes you can play.

WATCH LESSON 7 →
Lesson 8

3rd & 4th Finger Exercises

Complete the basic finger sequence by adding the third and fourth fingers, giving you a much wider range of beginner violin notes across all four strings.

WATCH LESSON 8 →